Home » Without Label » How To Paint Stained Kitchen Cabinets / How to - varathane gel stain on oak cabinets. # ... : We will add some moulding and antique glazing for a c.
How To Paint Stained Kitchen Cabinets / How to - varathane gel stain on oak cabinets. # ... : We will add some moulding and antique glazing for a c.
How To Paint Stained Kitchen Cabinets / How to - varathane gel stain on oak cabinets. # ... : We will add some moulding and antique glazing for a c.. I could write a lengthy, boring process on how to do it, but instead i'm going to give you a link on pinterest on how to paint stained wood kitchen cabinets. Stain is easier to touch up. Just scroll down and you'll see countless tutorials. Fill up a bucket with some hot water and tsp (follow the package instruction). If the paint is too thick, it will pool up in the corners and drip off the edges.
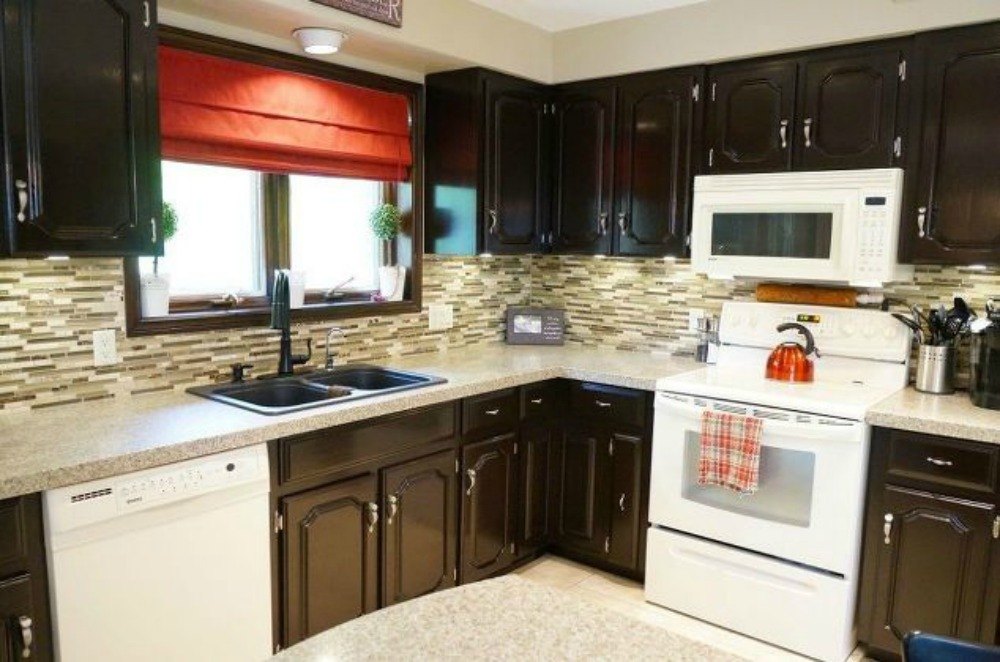
Painting your kitchen cabinets can instantly update your kitchen. Bring tired kitchen cabinets back to life with a good cleaning, new hardware, a fresh finish and a few simple, creative accents. Paint the fronts of your cabinet doors and the faces of your drawers (don't forget the sides). If your cabinets are stained, apply at least two coats of quality primer. Kitchen cabinets can get very greasy over the years, and one of the secrets to getting a smooth paint finish on your cabinets is to make sure they are cleaned before start painting.
12 Reasons Not to Paint Your Kitchen Cabinets White | Hometalk from cdn-fastly.hometalk.com If the paint is too thick, it will pool up in the corners and drip off the edges. Scrape the gelled finish off the cabinets using a paint scraper. These looks can be difficult to achieve with paint. Do you have to sand cabinets before staining? The paint process involves more steps and more materials is used. Because of the exceptional adhesion of bonding primers, sanding may not be necessary for most clean, paintable surfaces. Make your kitchen look rich and exotic by finishing your cabinets in black onyx. Laying the doors flat prevents drips, and you can paint the rest of the cabinets more easily without the doors in place.
If the paint is too thick, it will pool up in the corners and drip off the edges.
Scrape the gelled finish off the cabinets using a paint scraper. Painting or staining kitchen cabinets in black onyx. You can paint the cabinets for a solid look or use stain so. Mask off the interiors with painters' tape for a clean finish and sand only the front surfaces and visible edges of the cabinet face. Bring tired kitchen cabinets back to life with a good cleaning, new hardware, a fresh finish and a few simple, creative accents. Follow up with a couple coats of paint and you're done! To paint over stained wood you have to remove the varnish with either sandpaper or a deglosser. Let completely dry then prime all surfaces with a good quality primer sealer like bullseye or kilz. Do all of the cabinets the same way. Removing the doors can make it easier to paint your cabinets. Testing tips for painting kitchen cabinets. Fill a paint tray with your stripping agent and apply it to every stained section with a natural brush. After preparing the surface, apply a test area of the bonding primer, allow to dry properly and test for adhesion.
Scrape the gelled finish off the cabinets using a paint scraper. After preparing the surface, apply a test area of the bonding primer, allow to dry properly and test for adhesion. Before you stain the cabinets, it's important to remove all the doors and drawers to make sanding and applying the stain easier. Painting your kitchen cabinets can instantly update your kitchen. Apply a gel or liquid stripping agent to your cabinets with a natural brush.
How To Restore Oak Cabinet | Stained kitchen cabinets ... from i.pinimg.com You can paint the cabinets for a solid look or use stain so. You may be tempted to flip the cabinet doors and paint the backs today, but do not! These looks can be difficult to achieve with paint. It's also one of the more economical options but before you run to your hardware store and grab a bucket of paint, we have a few tips. Laying the doors flat prevents drips, and you can paint the rest of the cabinets more easily without the doors in place. Before you stain the cabinets, it's important to remove all the doors and drawers to make sanding and applying the stain easier. Wipe away any dust with a slightly damp cloth, then let dry. Apply the paint with a small foam roller to cabinet ends inside the house.
Then you can use a brush to apply a primer, working your brush using long strokes in the direction of the grain.
Also, remember to lay off after the surface has been painted. Because of the exceptional adhesion of bonding primers, sanding may not be necessary for most clean, paintable surfaces. Allow the coat to dry for 24 hours, unless otherwise directed by the paint's label. Kitchen cabinets can get very greasy over the years, and one of the secrets to getting a smooth paint finish on your cabinets is to make sure they are cleaned before start painting. Use a tack cloth to remove any sanding dust. After preparing the surface, apply a test area of the bonding primer, allow to dry properly and test for adhesion. Next, immediately paint the remaining flat areas of the door using a mini roller. Avoid getting brush marks on the flatter and smoother areas. This article explains basic techniques that will help you get the look of a new kitchen without the expense of new cabinets. Bring tired kitchen cabinets back to life with a good cleaning, new hardware, a fresh finish and a few simple, creative accents. Just scroll down and you'll see countless tutorials. Whitewashed kitchen cabinets back a country or afflicted theme, while aphotic colors improve your kitchen and add abreast address to the space. Do you have to sand cabinets before staining?
Allow the coat to dry for 24 hours, unless otherwise directed by the paint's label. Avoid getting brush marks on the flatter and smoother areas. Laying the doors flat prevents drips, and you can paint the rest of the cabinets more easily without the doors in place. Follow up with a couple coats of paint and you're done! This article explains basic techniques that will help you get the look of a new kitchen without the expense of new cabinets.
How to - varathane gel stain on oak cabinets. # ... from i.pinimg.com To paint over stained wood you have to remove the varnish with either sandpaper or a deglosser. Laying the doors flat prevents drips, and you can paint the rest of the cabinets more easily without the doors in place. Use a tack cloth to remove any sanding dust. I could write a lengthy, boring process on how to do it, but instead i'm going to give you a link on pinterest on how to paint stained wood kitchen cabinets. Painting your kitchen cabinets can instantly update your kitchen. Kitchen cabinets can get very greasy over the years, and one of the secrets to getting a smooth paint finish on your cabinets is to make sure they are cleaned before start painting. Wipe away any dust with a slightly damp cloth, then let dry. Use a wood sanding block to prevent rounding over the wood edges (image 2).
Apply the paint with a small foam roller to cabinet ends inside the house.
Using a 1 or a 1½ angled brush, first apply paint to the recessed or detailed areas of the cabinet door. Also, remember to lay off after the surface has been painted. Fill a paint tray with your stripping agent and apply it to every stained section with a natural brush. Allow the coat to dry for 24 hours, unless otherwise directed by the paint's label. Paint the fronts of your cabinet doors and the faces of your drawers (don't forget the sides). To paint over stained wood you have to remove the varnish with either sandpaper or a deglosser. We opted to paint the inside of the cabinets as well (there were a lot of stains and damage) so i used a mini roller and a brush and kilz original primer to get the job done. Wood stripper can be purchased at a local hardware store or online. Bring tired kitchen cabinets back to life with a good cleaning, new hardware, a fresh finish and a few simple, creative accents. Lightly sand the doors on all sides and faces (image 1). Fill up a bucket with some hot water and tsp (follow the package instruction). Select a stripper designed for cabinets by reading the label carefully. Simply dip the tip of a paintbrush in a color lighter than the cabinets and dab the excess onto a cloth until the brush is almost dry, then lightly graze the surface of the detail trim, corners, and seams.